How It Works

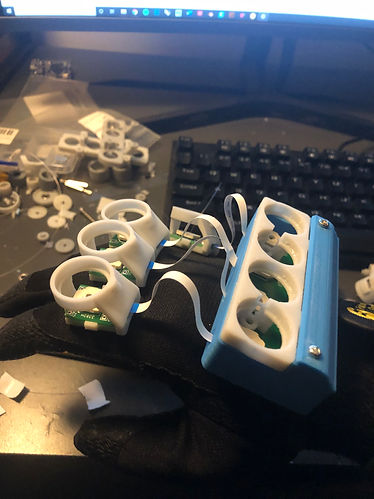
These spring-loaded pods are then inserted into the 3d-printed braces. The braces hold the body of the spring units so that the rod can spring freely inside. These units are meant to be individually replaceable, and everything is designed to be removable and replaceable without very much disassembly. The entire glove can be 3D printed in a total of 5 hours with about $5 in resin and $0.20 in filament for the hand housing. With a larger SLA print bed, however, this time could be reduced to as little as 2 hours. The cost of each spring unit is approximately $10. This is primarily due to minimum quantity orders for SMD components and could be reduced to $6 if smaller order quantities were possible.
VRGL uses spring-loaded potentiometers to collect angular data from each joint. The custom PCBs send data from the finger potentiometers back to a mainboard on the back of the hand using FFC flex connectors. This allows for all of the data to be accessed from one point. Each potentiometer has a rod that holds a spool. When a string is pulled from the spool, the potentiometer is turned. When the finger bend is reduced, a constant-force spring forces the potentiometer to spin back into its original position.

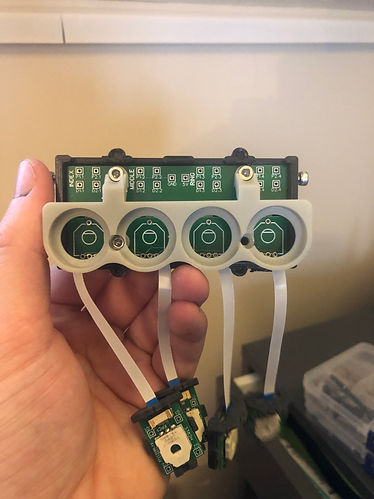

As you can see on the left, the FCC connectors are extremely tiny. They require hot air and solder paste as they're incredibly difficult to solder with an iron. Once connected to other connectors on the bottom of the base PCB, traces on the PCB allow potentiometer data to be accessed from the circled pins. The PCBs are also built with multiple unused pass-throughs. This is so that in the future, other components such as haptic motors can be added without a PCB redesign. It also allows for anybody to build their own and design their own peripherals. Each finger PCB has two data pins and two ground pins. A multimeter showed that all connections were soldered properly which tells me it's ready to be hooked up